CREAMWARE / SONIC CORE TUTORIAL
Follow this guides to learn the basic of the Scope Environment. It may seem complicate at the beginning, but you will find that the ideas are very very simple, and once you learn you will never be able to change your workflow and switch to another audio card... you will love Sonic Core cards!
If you see thumbnails, click on them to enlarge.
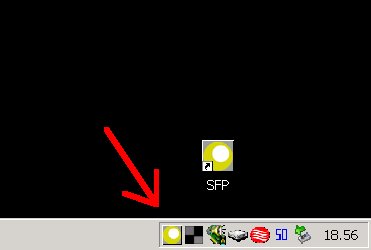
I suppose you have software version >4.0, that you have installed SFP package and the drivers. So, you will see a small SFP icon in the tray-bar. I will not deal with XTC mode, since i never used it, and i will explain how to use Sonar as a sequencer, simply because i own only that.
Now, click on the icon, and select "show" to see the ROUTING WINDOW. This is the heart of your Scope environment. Every connections will be set up here. In this window you can mix your music, effect your clips, generate first class sounds, create brand-new synths and effect using a modular-synth, route your audio and midi signals between your software applications or between your external hardware... pretty nice, right!?
For the sake of semplicity, i will start from a BLANK routing window. Your window will probably be different, having loaded a standard project. But i want to start from scratch with MY applications, to show you what you can done, first with the basic, than with more complex things.
Just to note it, you can move the modules on the routing window by clikcing on them, hold the button and drag them. You can click on a module and hit "del" to remove the module, and you can draw a selection rectangle to select multiple modules by click on an empty part of the window, hold the button and draw the rectangle.
A blank routing window will look like this:
![]()
Now, if you will open your sequencer, try to play some audio thru a mediaplayer or use a midi application, you will probably be able to do absolutely nothing, because there are no AUDIO DRIVERS and no MIDI DRIVERS loaded in the routing window. Moreover, the hardware connections of your audio card will receive no signal at all and will not be able to emit a sound. What a shame!

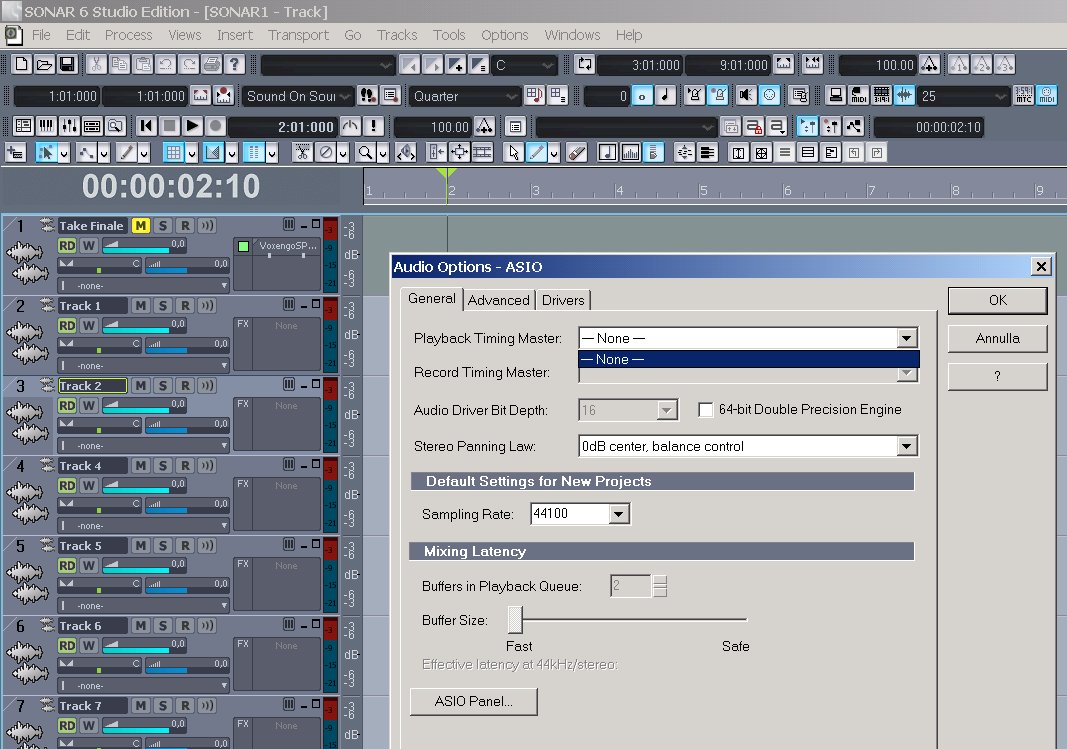
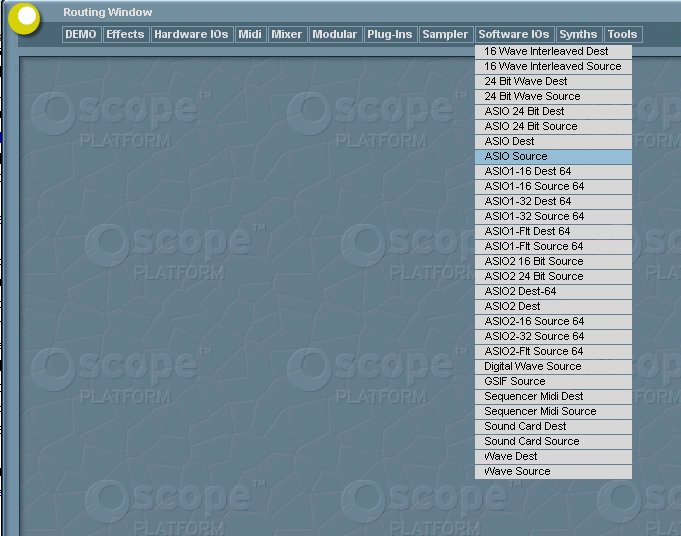
So, in order to be able to use audio and MIDI in your sequencer, you have to load software drivers in the routing window. Go to the "software IO Menu", click on it and watch the drop down menu. Select ASIO source, and see the corresponding module being loaded in the routing window.
Now, Scope is ready to receive audio data thru the ASIO driver from sonar.
If you load a sequencer, this is ready to play audio using ASIO drivers.

You can for example load an audio clip, hit play, and see the meter alive.
Nice... but you are still hearing nothing on your speakers!

Now you will learn the first basic principle of the routing window. Learn this, and all the rest will be pretty simple!
Begin by imagine the audio flow in your mind: the audio is played back by Sonar, so Sonar needs an AUDIO OUTPUT PORT (meaning, an ASIO OUTPUT CHANNEL) to playback. Remember one of the last images?
The Sonar window says that a PLAYBACK DRIVER was chosen, and this driver is the SCOPE OUT 1 (as written in my PC... i don't know how other sequencer calls it!). So the audio signal goes OUT from Sonar. Where does it go?
Remeber the routing window?
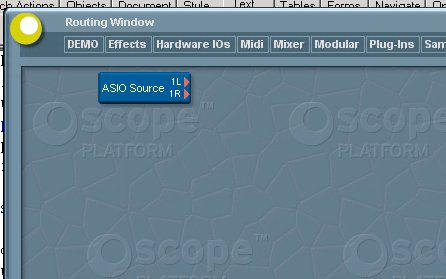
The audio signal appears here!
Now the audio ENTERS into the Scope enviroment, and it is treated as an AUDIO SOURCE. This is the reason why the module you load is called ASIO SOURCE in the routing window.
Now, forget Sonar for a while. Just imagine an audio flow that is coming from the ASIO SOURCE module in the routing window. What should you do with this audio? Normally, in real life, if you have an audio source like an hifi, an I-POD, or a CD player, in order to listen to some music you have to connect it to some speakers! So, in order to hear the audio which arrives in the routing window, you have to connect it to your speaker. And you do this by:
1) connecting the speakers (monitor, hifi...) to your hardware audio card
2) connecting the ASIO SOURCE MODULE to the speakers.
Let's do the operations together.
You have to connect your loudspeaker to the hardware Luca/Pulsar/Scope AUDIO OUT:

(the actual image from the LUNA card changes. Just be sure to connect your loudspeaker to the AUDIO OUT connector!!!)
Now, you need to come back to the routing window and tell the card that you want to send the audio flow to the speakers.
Go to the "Hardware IO Menu", click on it and watch the drop down menu. Select Analog Dest module, and see the corresponding module (PULSAR ANALOG DEST, in my case) being loaded in the routing window.
Now, you have to click on the small "1L" writing on the ASIO SOURCE module, and immediately after, on the "Lin" writing on the ANALOG DEST module.


Magically, you will see a line that connects the two modules. Repeat with the "1R" "Rin".
Even more magically, if you now hit "play" on your sequencer, you shuold be able to listen to the audio clip playing back from Sonar.
What have we done?
The audio plays back in Sonar thru the ASIO driver, and goes out FROM Sonar (so Sonar see and AUDIO OUT ASIO driver).
The audio comes INTO the routing window, where it is considered a SOURCE. It originates from the ASIO SOURCE 1 module. The lines you see between the ASIO SOURCE and the ANALOG DEST modules are "virtual audio cables". They connect any audio source to the audio destination of your choice. In this case, the audio flow is driven to the hardware output of your card, and it is heard on the loudspeakers.
This is the basic concept of the routing window, and you can apply it to whatever module you have.
Does it seems complicate? If you think so, just think about the audio pathflow once again.
All that you have done was simply to "connect" audio source with audio destination with virtual cables. This is the core idea of the Scope cards, and of the routing window.
If you have understood this basic principle, try to think about this: imagine to have at your fingertips infinte virtual cables, and being able to connect ANY audio source, being it hardware of software (i.e. generated by a virtual synth or by an hardware expander like a masterkeyboard/arranger) to ANY audio destination, even this being hardware of software (software or hardware effects, for example). Imagine to have a bag loaded with a tons of different effects, several mixers, several synths, all first-class quality and perfect soudning. And imagine to be able to choose as you wish between them and combine them as you want, to experiment with different effect chains, to treat the audio signal exaclty in the way you need to. And imagine to do this also with MIDI data.
This is not magic, but is the world of Sonic Core cards!
In the following parts of the tutorial we will explore the other wonders of the Routing Window.
The second tutorial i wrote will teach the basic of MIDI connections
If you find this tutorial useful, and if you want to support my work, i will appreciate an online Paypal donation! ;-)
You don't see frames?
Click here!